
#HTE
Beer Trough Picnic Table, Yea or Nay?
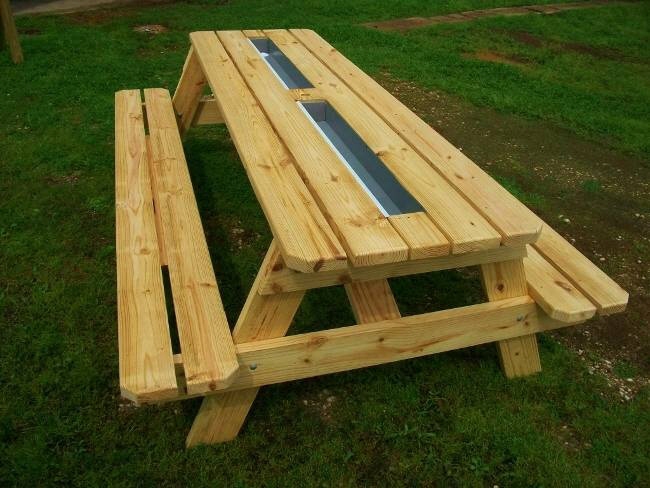
As industrial designers we’re meant to look at things critically, and to consider the full breadth of the user experience. So take a look at this and tell me what you think:

At first I thought, that’s a great idea. You’ve got nice, frosty beers right at hand. Picnic tables aren’t difficult to build, as furniture goes, and the handy among you could bang one of these out using dimensional lumber and a single saw. The trough wouldn’t be terribly difficult to add, or retrofit to an existing table; all you’d need are some rain gutters and caps. Should this be one of the summer furniture DIY projects Joel was talking about?
Then I started thinking about how you’d actually use this. When a layperson sees one of these photos, they’re only going to picture one moment of its usage: The moment a person is sitting at the table and reaches over to grab a bottle.

As designers, however, we should be thinking about all of the moments before and after, and considering how the user experience of this design stacks up, overall, against the alternative.
The Conventional Beer Cooler

Filling
At every backyard picnic or barbecue I’ve been to, the cooler is filled with ice from the freezer’s icemaker in the kitchen. Or if the cooler is large, occasionally with a purchased bag of ice. And you always put the beers in first, or at least I do, because then the ice fills up the negative space far easier than if you did it the other way ‘round. The cooler is then lugged over to the outdoor dining area.
Cooling
I like when the bottles are completely submersed in ice. If you avoid overloading it and you keep the lid shut, the beers stay frosty for a good while. If you overload it and keep the lid off, the sun melts the ice in no time and the beers don’t stay as cold. In my book, people who leave the lid off are worse than people who leave the door open with the air conditioner on.
Draining
At the end of the day you dump it out on the grass or over a drain, then put the thing away. There is no maintenance.
Beer Trough Picnic Table
Filling

Obviously you’re not lugging the thing over to the freezer, so you’re bringing the ice to it. If you’re using the freezer’s icemaker, you need some sort of container to carry the ice. Or you use the big store-bought bags of ice.
With a design like this, inserting the bottles first, then the ice, will be a lot more difficult than just dumping ice into a bottle-filled cooler. Alternatively you could add the ice first, then burrow each bottle down, but I think both are time-consuming.
Cooling

We’re not wine snobs here, so we’re going to blow right past the fact that they’re drinking Gallo in the photo above. Instead we’ll mention two other things I’ve decided I don’t like about this design, which are 1) the limited contact area of the ice, and 2) the exposure to the sun. I like my beers cold.
Draining
Then there’s the maintenance afterwards. You’ll need some sort of drain hole and plug, ideally with the bottom of the trough tilted towards it. Once it’s drained, and anytime after it rains, you’ll have to ensure there’s no standing water. Because if there is, at least in New York City in the summertime, you’ll create a breeding ground for the most annoying picnic guests of all: Mosquitos.
Table Space

Lastly, the beer trough takes up what is arguably one of the more important pieces of real estate on a picnic table, the center. That’s typically where the napkins, condiments, bowls of chips and platters of communal food and sides are placed.
Thus, the beer trough picnic table is a no-go for me. What say you?
http://www.core77.com/posts/54999/Beer-Trough-Picnic-Table-Yea-or-Nay